A couple years ago, Umbraco launched Umbraco Commerce - a rebranded version of a commerce platform they acquired. It's now available as a paid add-on for your Umbraco websites. 👏
I hadn't had the chance to use it yet. 😬 But I wanted to explore it and see how easy it is to get the Demo Store running and taking payments through Stripe.
In this post, I'll walk through setting up the Demo Store, adding the Stripe payment provider integration, and running a test transaction to see the full end-to-end process.
The official documentation covers the installation and configuration steps, but it's a little dry, it doesn't show what developers should expect to see once everything's working. This post aims to fill that gap.
Prerequisites
You'll need:
- .NET 9 SDK
- SQLite (default) or SQL Server 2022
- Stripe account (for test API keys)
Clone and run the Demo Store
Let's start by cloning the official demo repository:
git clone https://github.com/umbraco/Umbraco.Commerce.DemoStore.git
cd Umbraco.Commerce.DemoStore
This demo store targets Umbraco 16 and supports two database editions:
- SQLite (default) – ideal for quick local testing.
- SQL Server 2022 – a ready made .bacpac is included.
I went with SQL Server and imported the backup found at \db\UmbracoCommerceDemoStore_v16.0.0.bacpac.
After importing, I updated the connection string in appsettings.json:
"ConnectionStrings": {
  "umbracoDbDSN": "Data Source=localhost;Initial Catalog=UmbracoCommerceDemoStore_v16.0.0;Integrated Security=True;Persist Security Info=False;Connect Timeout=60;Encrypt=False;Current Language=English;",
  "umbracoDbDSN_ProviderName": "Microsoft.Data.SqlClient"
}
This configuration uses Windows Authentication (Integrated Security=True) to connect to my local SQL Server - no username or password required.
When reviewing the example SQL Server config, I spotted a few inconsistencies in the appsettings.json and markdown files. I submitted a fix and that PR has now been merged. 👏
Now let's build and run the test site:
dotnet build
dotnet run
Hey, it works! 🎉
I like working with HTTPS even on local, so I'd recommend trusting a dev certificate:
dotnet dev-certs https --trustIt's a good time to confirm we can actually log into the backoffice. The Demo Store ships with a preconfigured user: [email protected] and a password of password1234.
Install the Stripe Payment Provider
We can install the official Stripe payment provider through NuGet:
dotnet add package Umbraco.Commerce.PaymentProviders.StripeRebuild and run the website, and now in the backoffice we should be able to create a new payment method using the Stripe provider (navigate to Settings → Stores → Payment Methods).
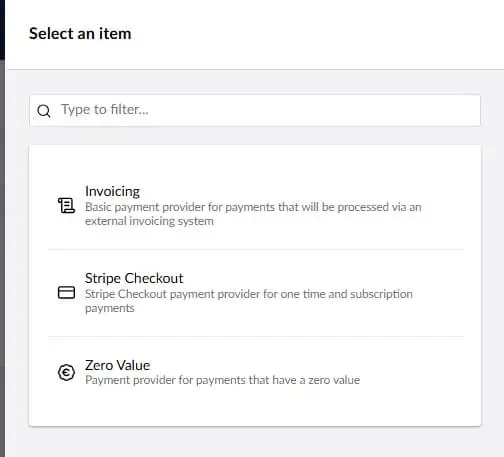
Once created, you'll be presented with a lot of configuration options.
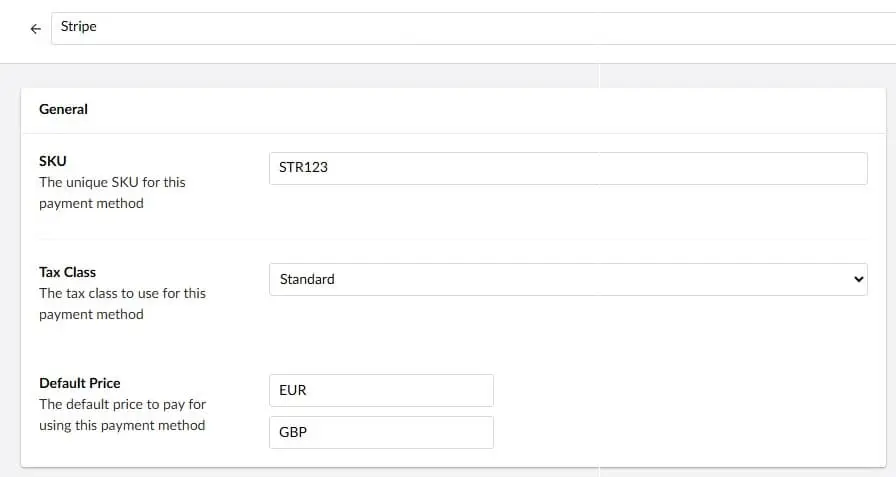
Give the payment method a unique SKU, assign a tax class (if applicable), and set a default price (if you charge a fee for this method).
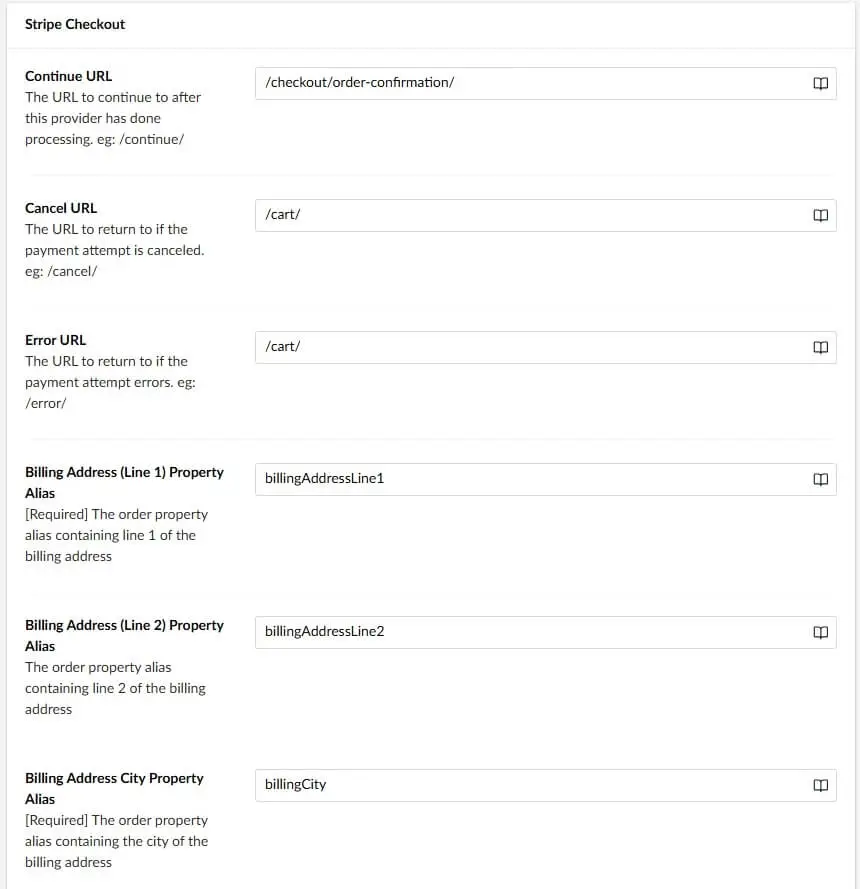
Configure the return URLs for success, cancel, and error. Also map the billing address fields (tell the provider which properties on the order model to forward to Stripe).
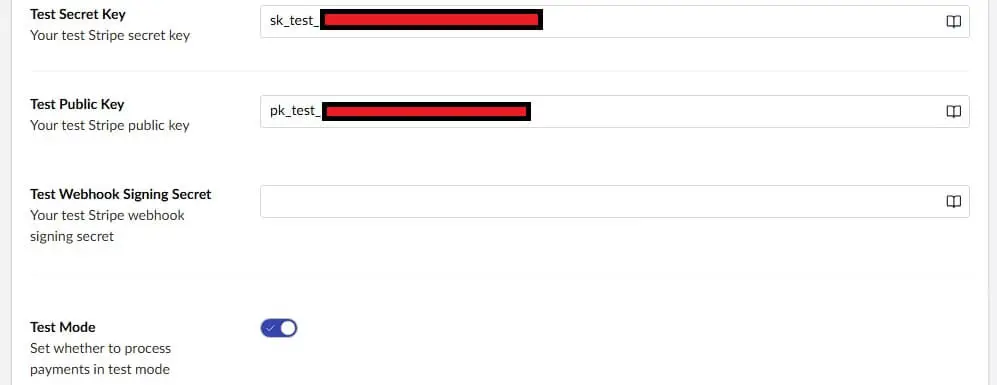
You’ll need a Stripe account. In the Stripe dashboard, copy your Publishable key and Secret key into the provider fields and toggle Test mode.
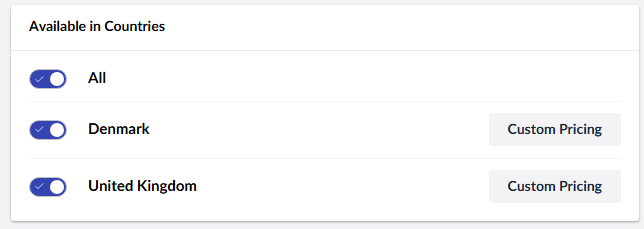
Enable the payment method for the countries where it should be available:
Place a test order
Head over to the front end and add a product to your basket so we can test placing an order. Proceed to the checkout, and you should now see Stripe as a payment option.
For test payments, Stripe’s standard test card is:
- 4242 4242 4242 4242
- MM/YY: any future date
- CVC: any 3 digits
After payment, Stripe redirects back to your confirmation page. At this point, the order is created but still Pending, Umbraco Commerce hasn’t yet received confirmation that the payment succeeded.
That confirmation arrives via a webhook event, and the documentation does a great job already at covering how to configure this locally. It shows you how to set up ngrok to forward the webhook payload to your local instance of Umbraco.
Now when you've paid for an order, and the payment is captured, order within Umbraco's backoffice will be updated to reflect it.
Going live
If this were a real website you were building rather than just the Demo Store, you'd also need to create the logic and pages for the full checkout process, the Demo Store takes care of that for us.
If you were preparing to push a production-ready site live, there are still a few important steps to complete:
- Generate live API keys in Stripe
- Switch the provider from Test to Live mode
- Configure a live webhook endpoint (and secret) on your production domain
- Update success/cancel/error return URLs if they differ in production
- Run a small live transaction to confirm the full checkout flow
And that’s it - you’re officially taking payments! 💸